![]()
I’ve been away from this chat room and trading because of my wife’s recent surgery and treatments for cancer. The great news is that the wonderful folks at the Mayo Clinic (where we’ve been for the past few months) believe they got it all, and I may return to trading a little… the past months surely changed my perspective on things!
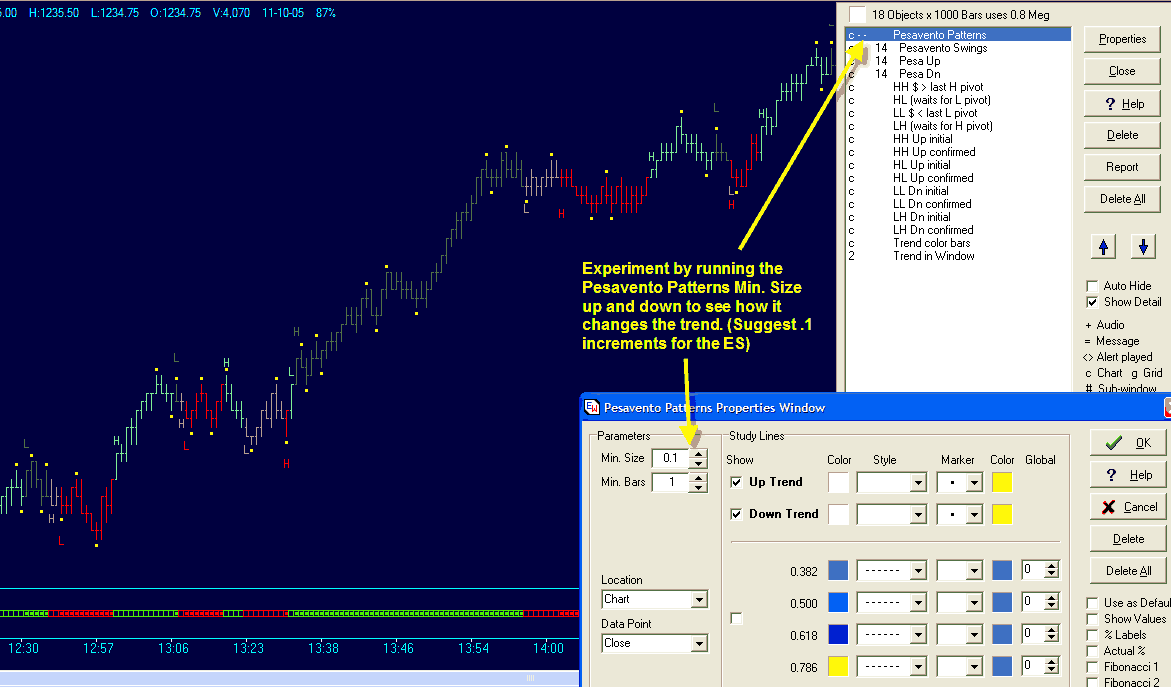
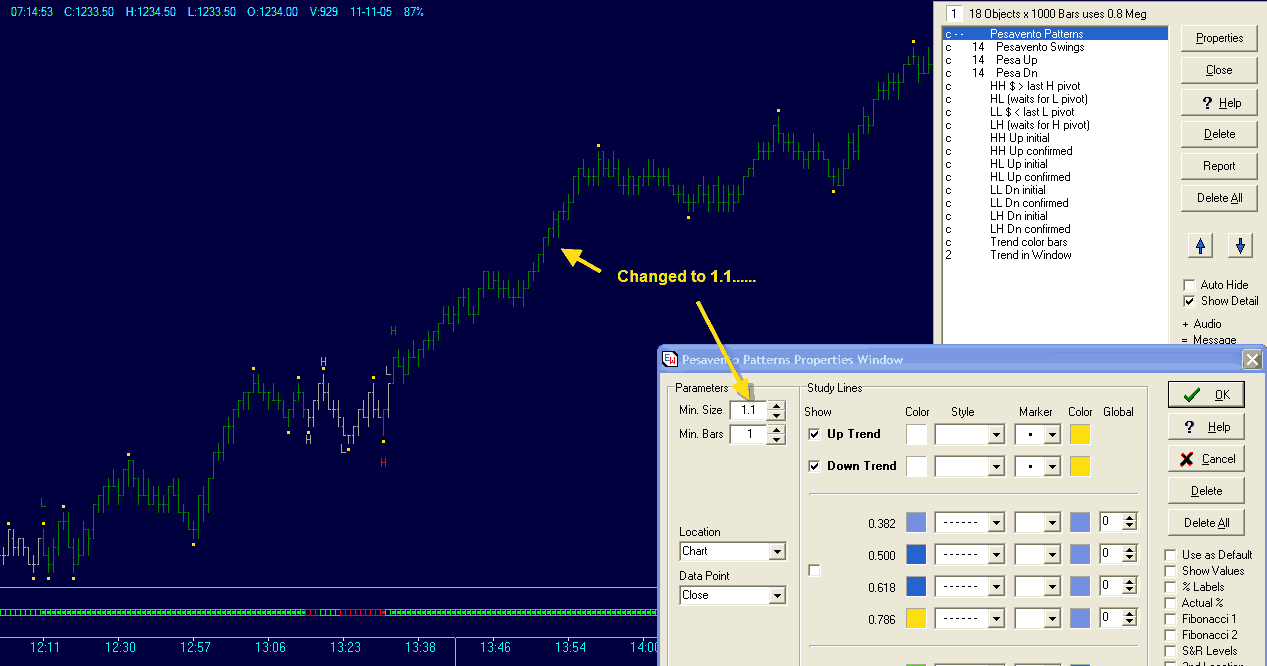
While we were there, I tweaked a few templates during some quiet time (I like to think of it as distracting and stimulating instead of obsessive behavior), and this was one of the “tools” I developed that I thought might be of interest to help visualize the concept of trends due to price action (PA). I know Buffy likes to teach the HH / LL concept, and I hope this is a way to “give back” in a small way for all the knowledge I’ve gained since I found this room and Ensign…
Thanks for all the tools and knowledge – esp. Buffy, Ninja, Goinglite, and Howard
( amazing stuff, this Ensign!!!)
123
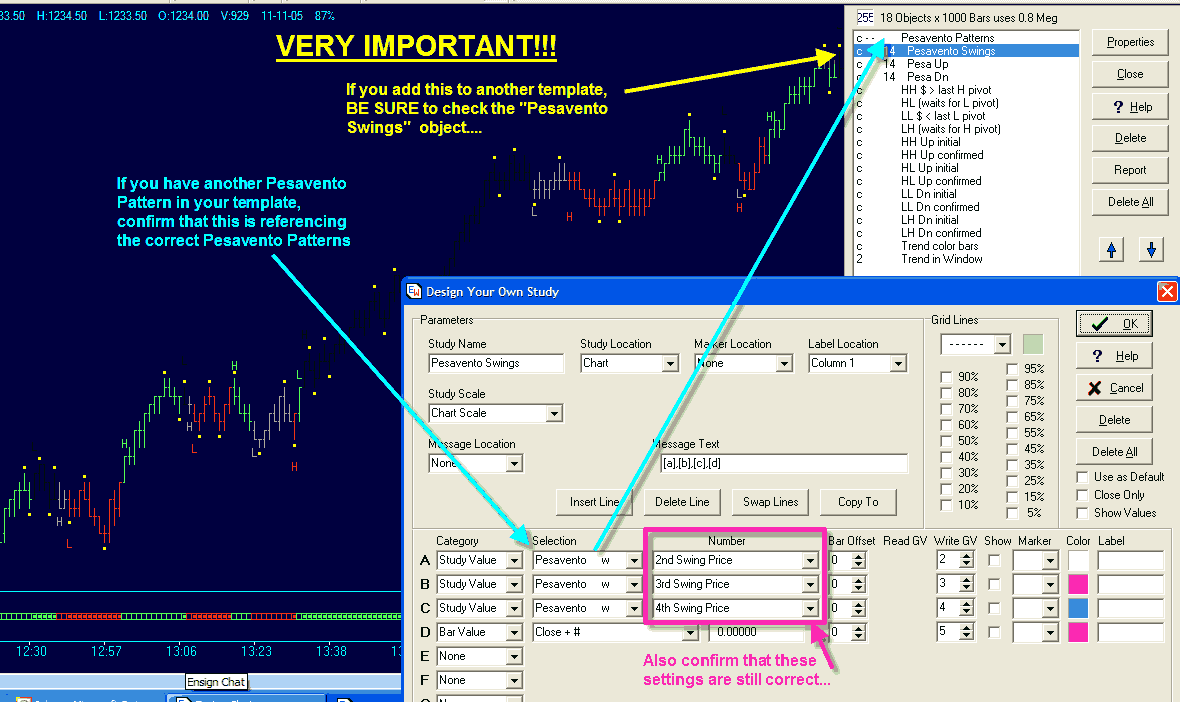
CAUTION (11/13/05)
I just tried adding that PA Trends to another template,
and there are additional problems in the objects when it loses the reference
to it s Pesavento Pattern
It works if it's the 1st template on the chart
and then another is added (most times), but this is a similar problem that Howard
was able to fix months ago with MA s losing their references
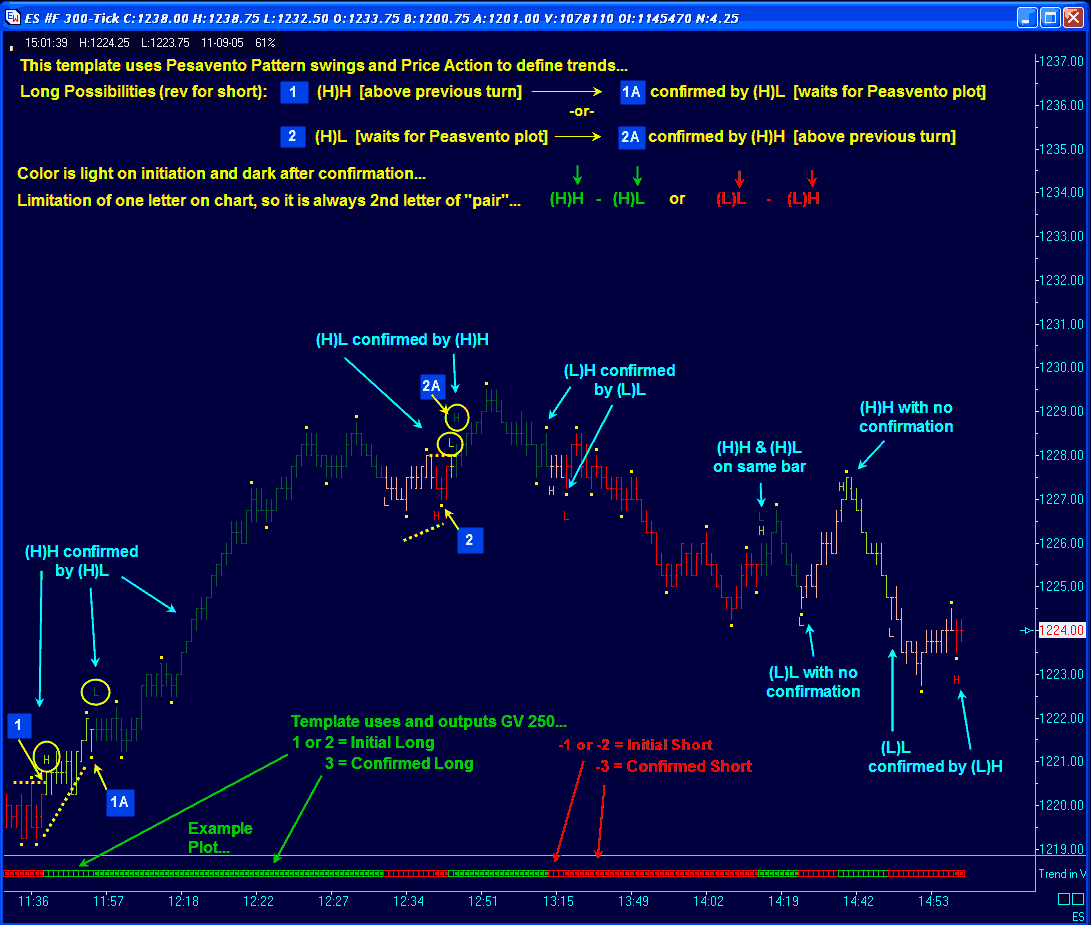
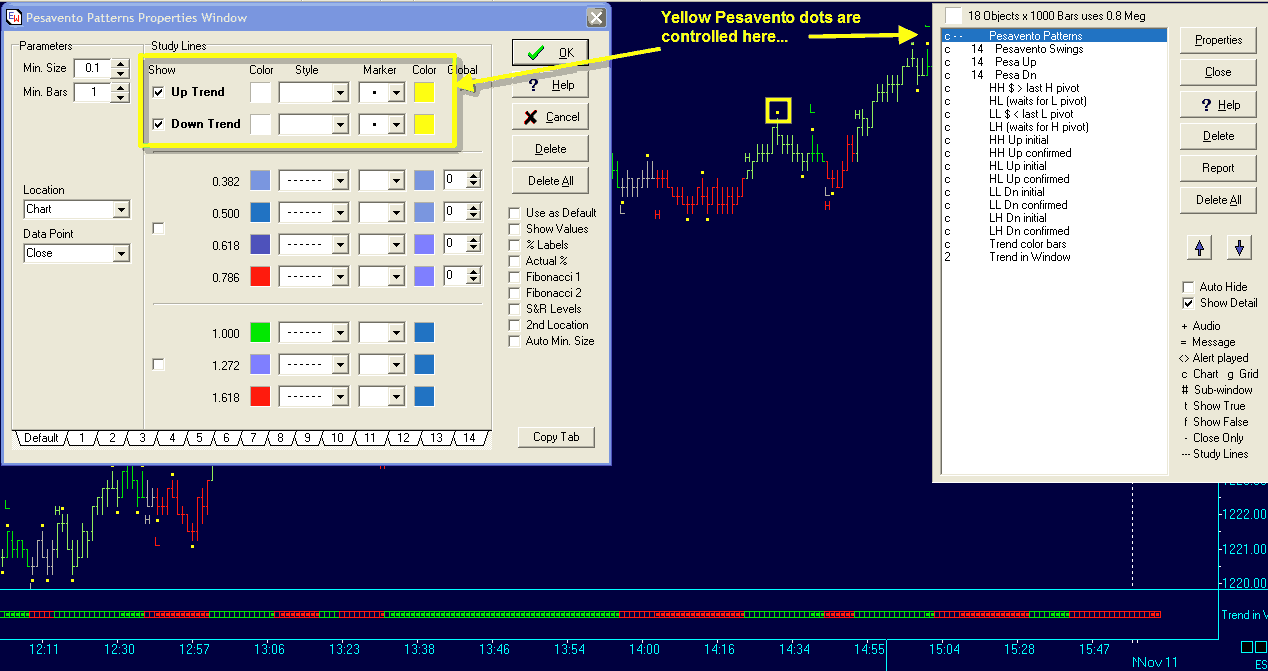
The template “PA Trends” will initiate a trend in either direction and then confirm the move by waiting for the “complement” of the initiator…
It uses the Pesavento (can be freely adjusted) to trigger and then confirm
trends…
HH or LL begins when the previous level is first crossed, but
HL or LH has to wait for the Pesavento plot…
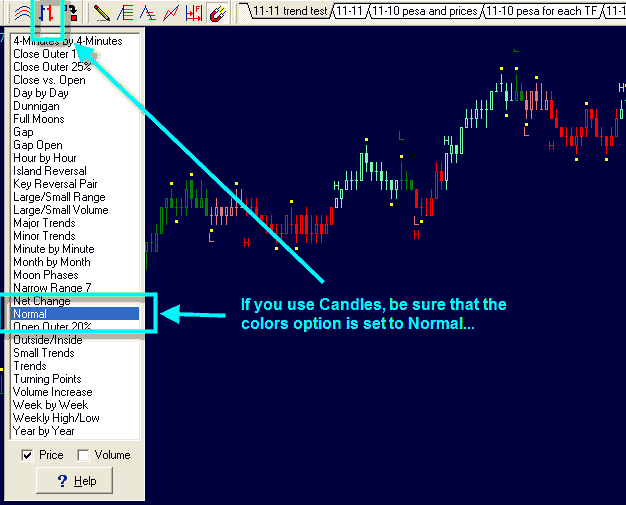
I thought a bar chart was
easiest to visualize, but candles work fine if their color is set to normal…
“Maker” is can only assign one letter, so I “dropped” the
first of any pair on chart… (H)H, (L)L, etc…
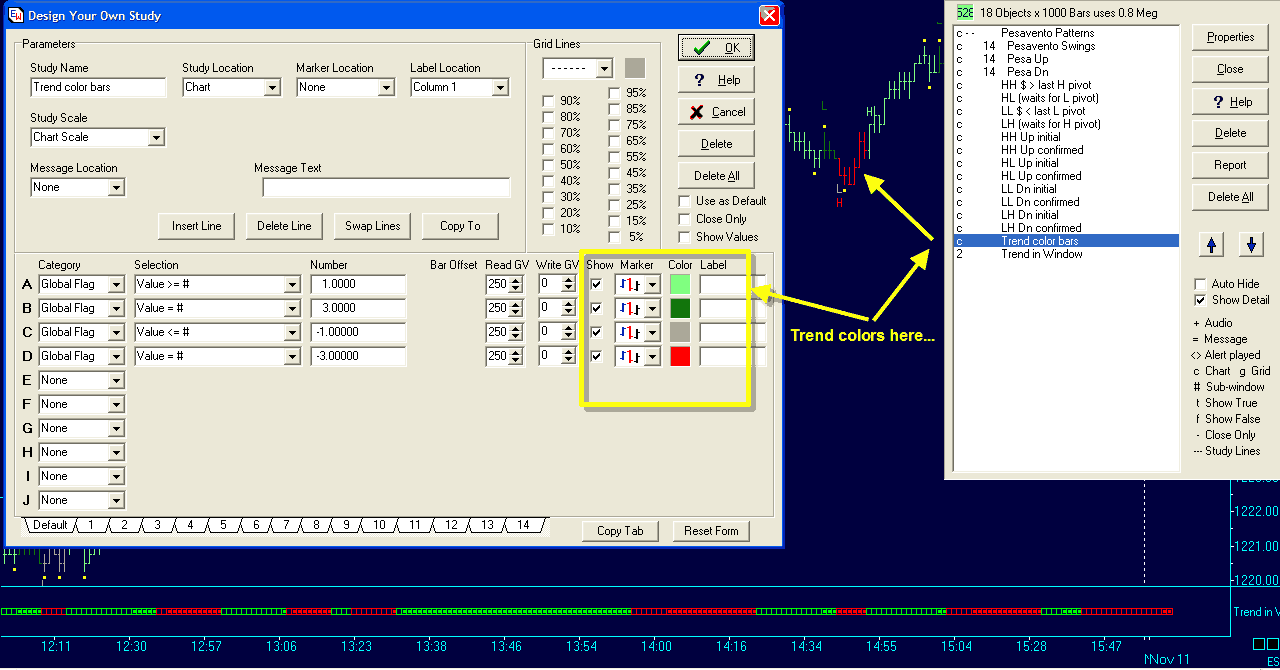
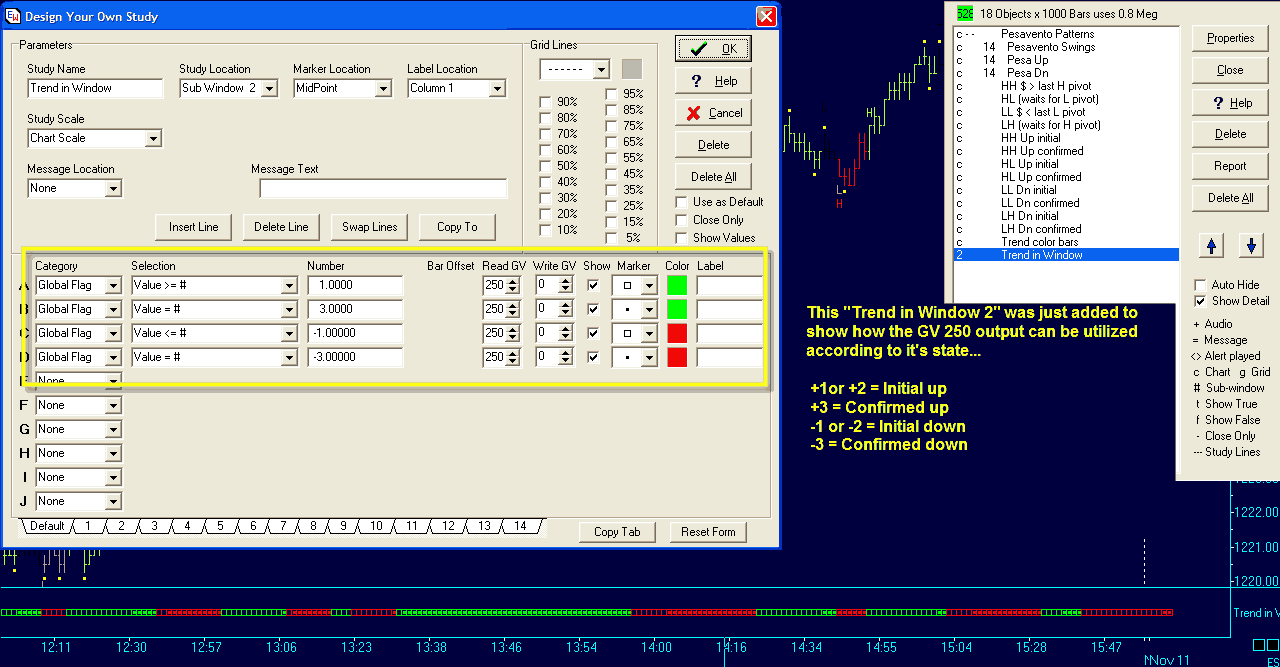
It outputs (and uses) GV 250 & it
can referenced in any way appropriate (example plot in lower window)…
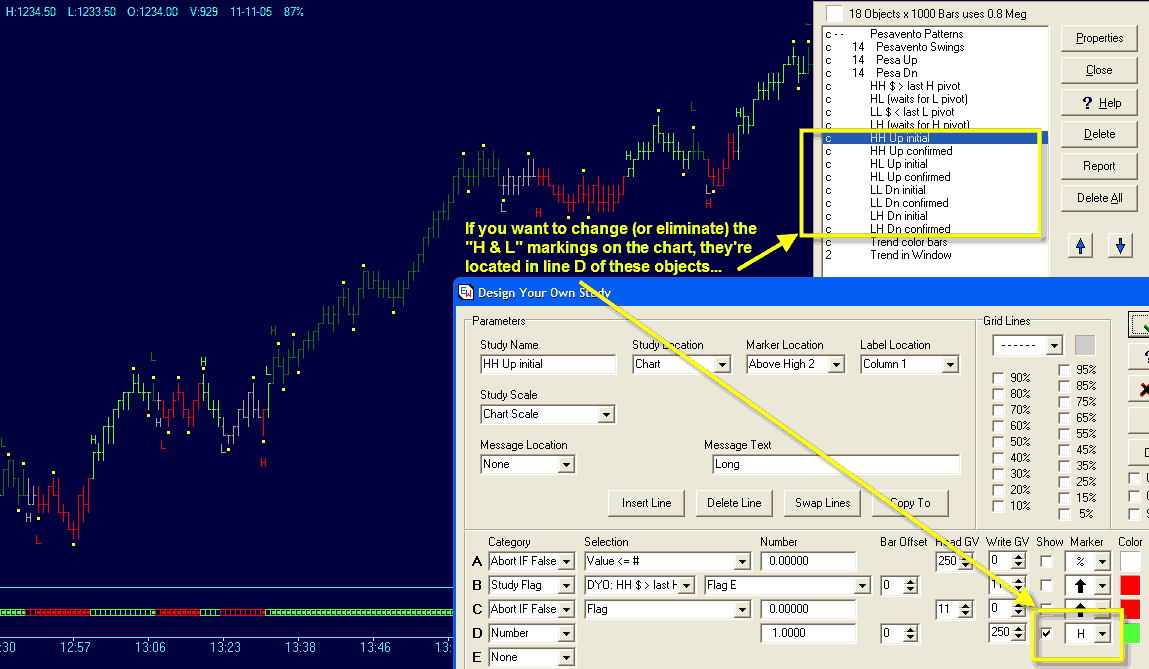
If
you add this to another template, I’ve had instances of 2
objects in it changing – be sure to see last image
below…
It’s easier to just show a few examples, so a number of pictures are included below…